THE LATEST
Showing posts with label DIY. Show all posts

DIY Decor for Your Dorm Room


When “Home Sweet Home” turns into “Dorm Sweet Dorm” there are ways to make what might be your small and cramped space feel more like a second home and reflect your personality and interests. Decorating your dorm can be done on a budget with DIY methods.

1. Tapestry 

To quickly fill up wall space, find tapestry that speaks to you and hang it up. These decorations are available in all sorts of cool patterns, colors and designs. Whether you’re looking for an abstract print, a bohemian scheme or a girly floral design, tapestries come in a variety of assortments to meet your taste.

2. Paint samples 

If your university doesn’t let you paint the walls, don’t fret. If you’re looking for an alternative way to brighten up the space, paint samples are your best friend. Arrange them in whatever pattern you please, and they quickly turn white space into a creation of your own. You can even make an ombre pattern using the samples.

3. Pin boards 

To remind yourself of good times like dinner with your family back home, a movie night you had with your significant other, a road trip with friends, pinning up things that remind you of good times along with concert tickets, postcards and inspirational quotes can help you feel more at home in your home away from home and give you a reason to smile during late night studying. 

4. Block letters 

Using block letters to spell out words, your initials or your name are a cheap and fun way to add some character to your room. To get more creative, buy wooden or plain block letters from the crafts store and decorate them with paint or glitter for a little extra sparkle.

5. Mason jars 

 Customizable using paint, lace, glitter, ribbon and other craft tools, mason jars can work as cute decoration, convenient jars for storing pens, using as a vase for flowers, or as lanterns. By adding a simple electric candle into them, they can provide a warm glow to the room that will make it feel as cozy as ever.

By: Emily Dabau | Image: Source, Source2

Dorm Decor: DIY Inspiration Wall


Almost everyone has seen the all-too-familiar wall of pictures in the dorm -- you know, the head-to-toe photo montage of family and friends. Well, dorm decorators, it’s time to switch up your design. College is a time for dreaming, planning and achieving. With all the distractions of dorm life, stay on track by decorating your room with an inspiration wall.

Although there are many ways you can create an inspiration wall, one of the most unique ways is through picture frames. Stop by your local dollar or crafting store and pick up a variety of picture frames in different shapes and colors. As far as what goes in the frame, that depends on you. Fill the frames with your hopes and dreams, use pictures of places you dream of going, people you aspire to be like, quotes that motivate you and lists of future goals.


If you lack the time or effort to go out and get picture frames, try covering a cork board with inspiration. This is a cheaper and more condensed inspiration wall, which is great for smaller dorm rooms. A great way to do this is with magazine pages and newspaper cutouts.

However you decide to do your inspiration board, put a lot of thought into it. The more inspired you are, the harder you work. And the harder you work, the more goals you will accomplish. Get inspired, and dream big.

By: Alexandra Abboud | Images: 1, 2

Halloween Inspired Glitter Pumpkins


October is almost over, which means that fall is in full bloom and Halloween is right around the corner ... tomorrow, to be exact! With a packed social calendar, it’s important to plan out decorations early. And what better way to welcome the spooky holiday than with a Halloween inspired DIY?

This year, instead of putting up only store-bought decorations, we have a quick and easy craft to transform your plain pumpkins into masterpieces. Glitter pumpkins are the perfect addition to anybody’s space, and if you’re the kind of person who loves to be festive but finds carving to be a tedious and difficult task, then this project is for you.

What you will need:
  • Pumpkins (any size works!)
  • Loose glitter
  • Mod Podge
  • Brush

After all of your supplies are laid out and ready to go:

     1. Dip the brush in Mod Podge and then blot it a couple of times on newspaper to remove the      
         excess.

     2. Starting on one side and working your way around, paint Mod Podge onto every other node of 
         your pumpkin for stripes, or use your brush to dab on small circles for dots.

     3. Once that is done, grab your glitter and one by one start glittering each section of the Mod Podge.

     4. Shake the excess glitter off of your pumpkin.

     5. Repeat these steps as many times as you need to, depending on how big your pumpkin is.

It’s that simple. Whether you’re planning on putting your pumpkins in your house, apartment or office, this DIY will spice up almost any space. Now head on over to your nearest craft store to pick up some supplies, and try it out for yourself.

By: Nicole Levitt

DIY Dorm Decor: Upcycle Bottles


It can be difficult trying to make a stark-walled, tiny dorm room feel like home after getting use to mom’s warm touches of family photos and fancy decorations. But it can be a home away from home, even if it is a mini version. Budget-friendly DIY projects add the needed color and personality. Take the common campus item, a glass bottle, and upcycle it into dorm décor.

Drinking/Shot Glasses 

For the Corona Drinking Glasses, grab these items:

  • Cotton string
  • Acetone
  • Ice cold water 
  • Matches/lighter
  • Sandpaper
  • Glass bottle


1. Wrap about five times around the area that will be cut; tie string, and cut loose ends. Remove string, and soak it in acetone, while maintaining its wrapped form. Place the string back on the bottle.

2. Set fire to the string over the sink. Rotate the bottle in order to evenly distribute the flame.

3. Once the flame begins to fade, submerge the bottle in ice water. Break the bottle in half, using the new weak spot. (You may want to protective gloves or glasses to do so.) 

4. Use sandpaper to smooth out the edges.

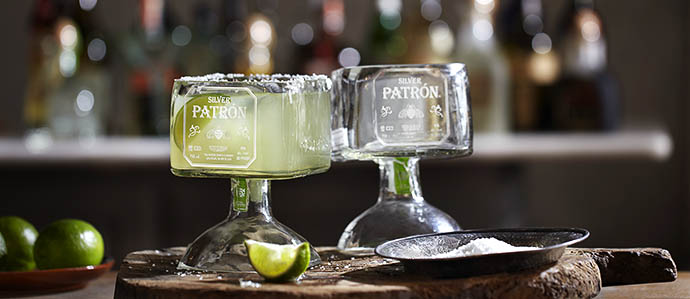
Or there’s always these snazzy Patron Margarita Glasses. The glass will be cut the same, but buy dishwasher-safe glass adhesive to glue the stem and the top together. They look pretty darn awesome with the Patron bottle but don’t be afraid to try out a different bottle type.


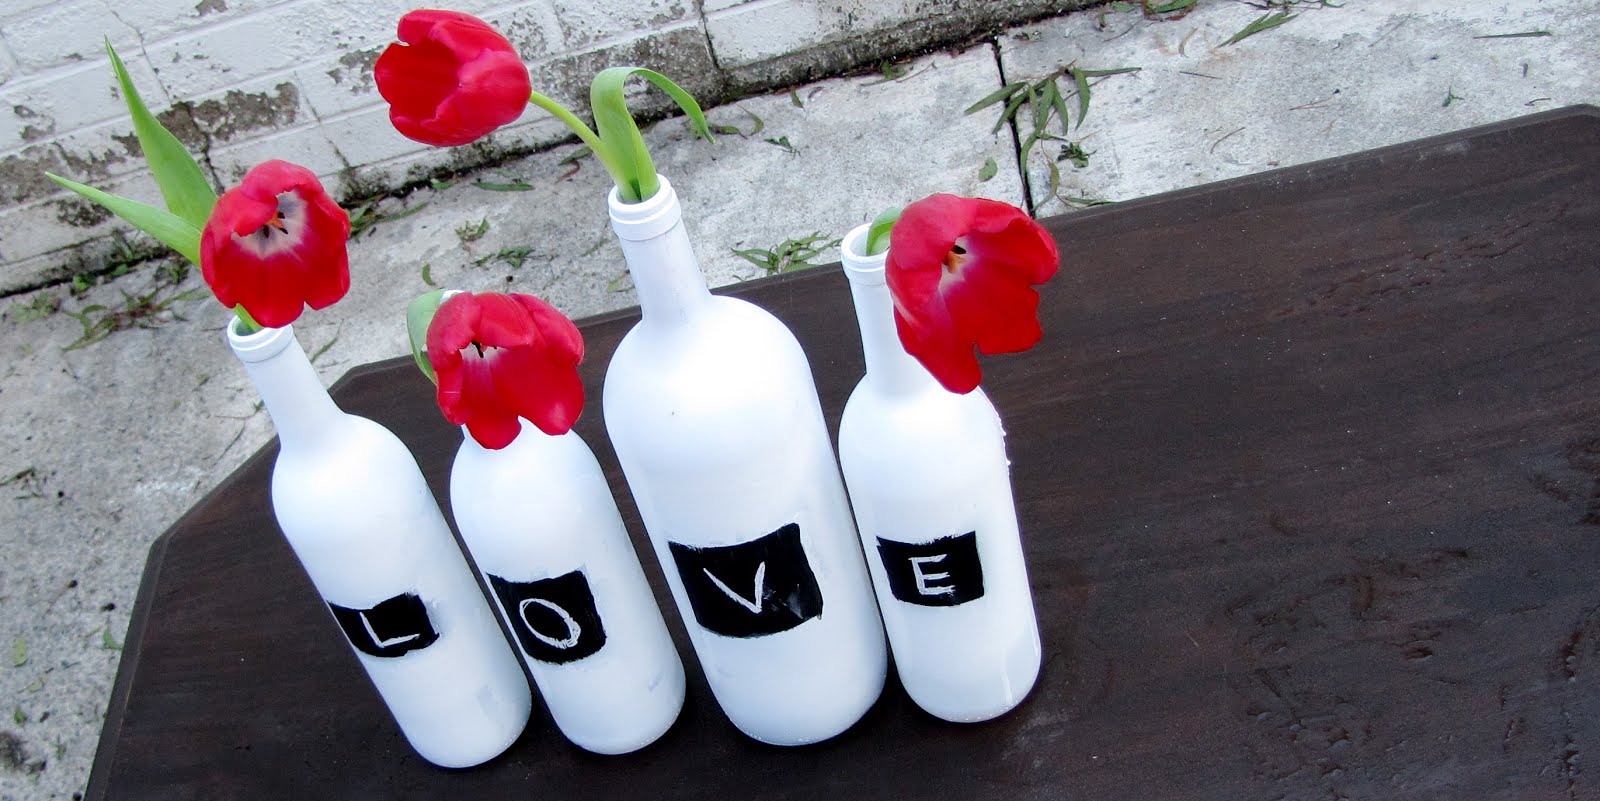
To create the Message Vases, the supplies needed are:
  • Chalkboard paint
  • Regular paint
  • Empty wine bottle


1. Paint the bottle using the regular paint. Let it completely dry.

2. Decide where and what to write on the bottle and use the chalkboard paint to fill that area. Let it completely dry before writing on the bottles.

Check out this list of additional ideas:

Set aside some time during summer vacay, and craft some things to furnish your empty, dull apartment. Adding a homemade piece or two will bring the feeling of home all the more closer.

By: Kiarra Sylvester | Images: 1, 2, 3

4 Eco-Friendly DIY Cleaning Supplies


Every girl has a couple beauty secrets up their sleeve; however, it’s equally important to know a few cleaning remedies for the home. CG loves eco-friendly, green cleaners, as creating some of these homemade concoctions can not only save money but also can clear out a little extra storage space and lighten up the chemical load. (To get the best results be sure to shake mixtures before each use.)

Get started with this grocery list:
  • White vinegar
  • Dawn dish soap
  • Fabric softener
  • Baking soda
  • Olive oil
  • Lavender and citrus essential oil
  • 4 spray bottles

Window Cleaner
Instead of purchasing a new bottle, feel free to use an old Windex (or any liquid glass cleaner) bottle. Fill half of it with white vinegar, then top it off with water. Add a teaspoon of Dawn soap, replace the spray bottle cap, and shake the mixture until it has an even texture.

Wood Cleaner
Mix 2 teaspoons of olive oil, 2 cups of water, ¼ cup of white vinegar in a new spray bottle. Last, add citrus-scented oil to scent as little or as much as desired.

Fabric Deodorizer
In a spray bottle, take ⅛ cup fabric softener, 2 tablespoons of baking soda, fill the rest with water. Add a few drops of lavender essential oil. Shake to blend.

Bathroom Cleaner
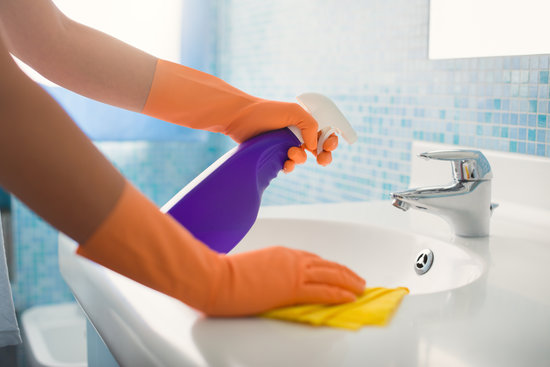
Add ½ cup of vinegar, ¼ cup baking soda, 2 liters water and citrus essential oil to a spray bottle. Shake, then use.

CG has provided a quick and safe ways to create some of the most popular cleaning supplies -- so don’t panic next time they run out, just add a few additional ingredients to the grocery list and make a fresh batch of whatever is missing. Be sure to do a test trial on a small area before completely misting everything down.

By: Kiarra Sylvester | Image: Source

Fashion and Beauty Pinners to Pinch


Over the past decade or so, millennials have seen their fair share of social networks come and go. Pinterest is proving to be a useful new network. From doable dinner dishes to fixing fashion dilemmas, it’s a treasure trove of inspiration. But with seemingly unlimited boards to follow, it can become overwhelming. College Gloss is here to to dish out some of our favorite fashion and beauty boards to follow.

College Gloss, we don’t want to toot our own horn, but we keep our glossers up to date on the latest fashion, from DIYs to awesome designers and fashion.

Cosmopolitan has a way of making the latest trends sexy. And let’s face it, at times, cute won’t cut it, and a touch of sexy never hurts.

Drop Dead Gorgeous Daily features tons of boards that cater to beauty and style, each one of them unique and filled with flamboyantly stylish items. From professional attire to much-needed accessories, this pinner features it all!

Eat. Sleep. Wear. features funky items for the everyday girl; meaning the pins aren’t all runway fashion. After all, not everything seen in the fashion world in meant to be worn off the stage.

Life’s a Fashion Show offers fun and bright fashion pins. Ditch the black this summer and be inspired by this board.

Summer Doll is a DIY fashion board with plenty of projects to help occupy any dull summer days.

Fashion Sense provides fashion pins for the divas of the world. The items on this board scream, “take charge.” It’s always best to dress for success.

Who’s the Fairest of Them All will have pinners trying out new fabulous makeup colors. Be bold and beautiful with awesome accent colors.

It’s a Woman’s World celebrates what it is to be a woman in all aspects, including beauty and style.

Hair, Makeup, and Beauty focuses on DIY skin products and facial hygiene. Every woman should take the time to pamper herself down to the last pore! This board will help find DIY home remedies that will keep skin soft.

With pinners like these you’ll have plenty of inspiration to keep you fashionable at all times. CG wants to hear from their lovely glossers though, so post and share some fashion and beauty faves of your own.

By: Kiarra Sylvester | Image: Source

6 Ways to Have a Productive Summer

Summer vacay is a much needed period of relaxation, but don’t get too comfortable; it can feel like there’s nothing worse than getting to the end of the summer and realizing there’s nothing to show for it. College Gloss is here to point you in a productive direction.

1. Working out can be a bore, but don’t let that break a health kick this summer, so take up a new form of fitness. Exercising can seem like punching a clock, especially when doing it alone; ask a local gym about a Zumba or yoga class. Round up the girls and try out a new class.

2. Although it’s summer vacation, and it has already been embedded in the brain to focus on relaxation, try to find an internship. Just because the seasons have changed, doesn’t mean the level of progression plummet - use the summer to stay sharp.

3. Part time work will become your new best friend ... well, on paydays that is! Nonetheless, a part time job is preventative of a little disease by the name of “Midday May” boredom. Trust us, it gets lonely being the only one home all week.

4. Purge your closet before heading out for new fall clothes. Summer purging can bring joy into any gal’s life, but it is more difficult for some than others; however, it can be much needed. Start by removing anything that is discarded, long forgotten on the floor of the closet. Looking for a push to purge? Here are the perks: 1. Room for a new wardrobe 2. Extra cash, try selling some of the baggage to places like Plato’s Closet. 3. Piece of mind due to less clutter 4. Feeling good, donate to Goodwill 5. Less to haul back to college in the fall

5. Create a summer reading list. The way CG sees it is during the school year there’s less time cut out for leisure reading, and there’s no better time than the summer to catch up on all the juiciest novels of the past year. So grab a novel, and lose yourself on the nearest “sunbrella.” Bonus: reading can help increase your writing skills, which will help with essays when classes resume.

6. It may sound dreadful, but consider taking on a few summer credit hours. Being ahead can help ensure graduating on time or help lighten the course load in the future. Try an online class, so you don’t even have to get dressed for class. Or consider fun courses, where travel makes them feel like a vacay of its own.

Sacrificing a slice of summer may seem terrible at first, but we promise the reward will be worth it in the long hall, when you walk into the first day of class organized and ahead of your peers.

By: Kiarra Sylvester | Image: Source

DIY Bracelet: The Best Arm Candy

Bracelets have recently become the “it” accessory. Between wrap bracelets and watches, girls have been accessorizing their wrists and arms with fun bracelets. We have a DIY bracelet that is sure to make your arms the best accessorized part of your body!

Charm Woven Bracelet

What you will need:
  • Chinese knotting cord
  • Metal charm/design piece
  • Scissors
  • Embroidery needle

1. Cut the knotting cord into two 30-inch, two 20-inch and one 10-inch lengths to start. Using your charm (a ring works great!), fold the 20-inch piece in half pulling the loop through the ring. Fold it over the ring and pull the rest of the cord through the loop. Repeat the step on the other side of the ring with the other 20-inch cord.

2. Center the 30-inch cord under the two middle strands. The right cord needs to be folded over the middle strands and under the left cord. Then pull the left cord under the right and middle strands and through the loop on the right side. You will need to pull tightly and slide the knot up to the top. Fold the left cord over the middle strands and under the right cord. Then pull the right cord under the left and middle strands and through the loop on the left side. This is a square knot. Repeat these steps -- left, right, left, right and so on.

3. Continue those steps until you have reached a desired length, keeping in mind that the clasp will take up approximately half an inch. Once you have reached that length you will need to thread one of the cords onto a needle and sew up the center of 3-4 knots along the backside. Then repeat that on the other cord. Trim away any excess once you have done that. Melt the tips with a lighter to seal it for extra hold.

4. Shape the bracelet into a circle and overlap the middle strands to make a sliding closure. You can use scraps to temporarily tie the cords together at each end. Then take the 10-inch cord and center it under the strands. Tie square knots exactly the same way you did for the bracelet before stopping at about half an inch. Then sew the knotting cords into the backside of the closure.

5. Remove the temporary ties. The two sets of middle strands are now adjustable ties of the bracelet. Adjust to it to fit your wrist and then tie each end into knots. Trim away any excess. Your charm woven bracelet is now done.

This bracelet will make for the best arm candy. It is sure to make all of your friends jealous!

By: Julia Morgan | Image: Source
 
Back To Top
Copyright © 2014 College Gloss. OddThemes